Data Streaming
In this guide, we will look at how to setup and use Enterprise Data Streaming (or "EDS" for short).
The Data Streaming functionality is only available with Enterprise Subscriptions. Please contact Sales if you would like more information about using EDS as part of your integration.
Background
EDS provides the ability for you to receive semi real-time database change data capture events from the Shopmonkey database for your data. These changes are automatically collected and partitioned for your data and you can stream this data to the EDS server automatically. The EDS server is a free, open source server provided by Shopmonkey which you can use to stream this data to your own destination.
Architecture
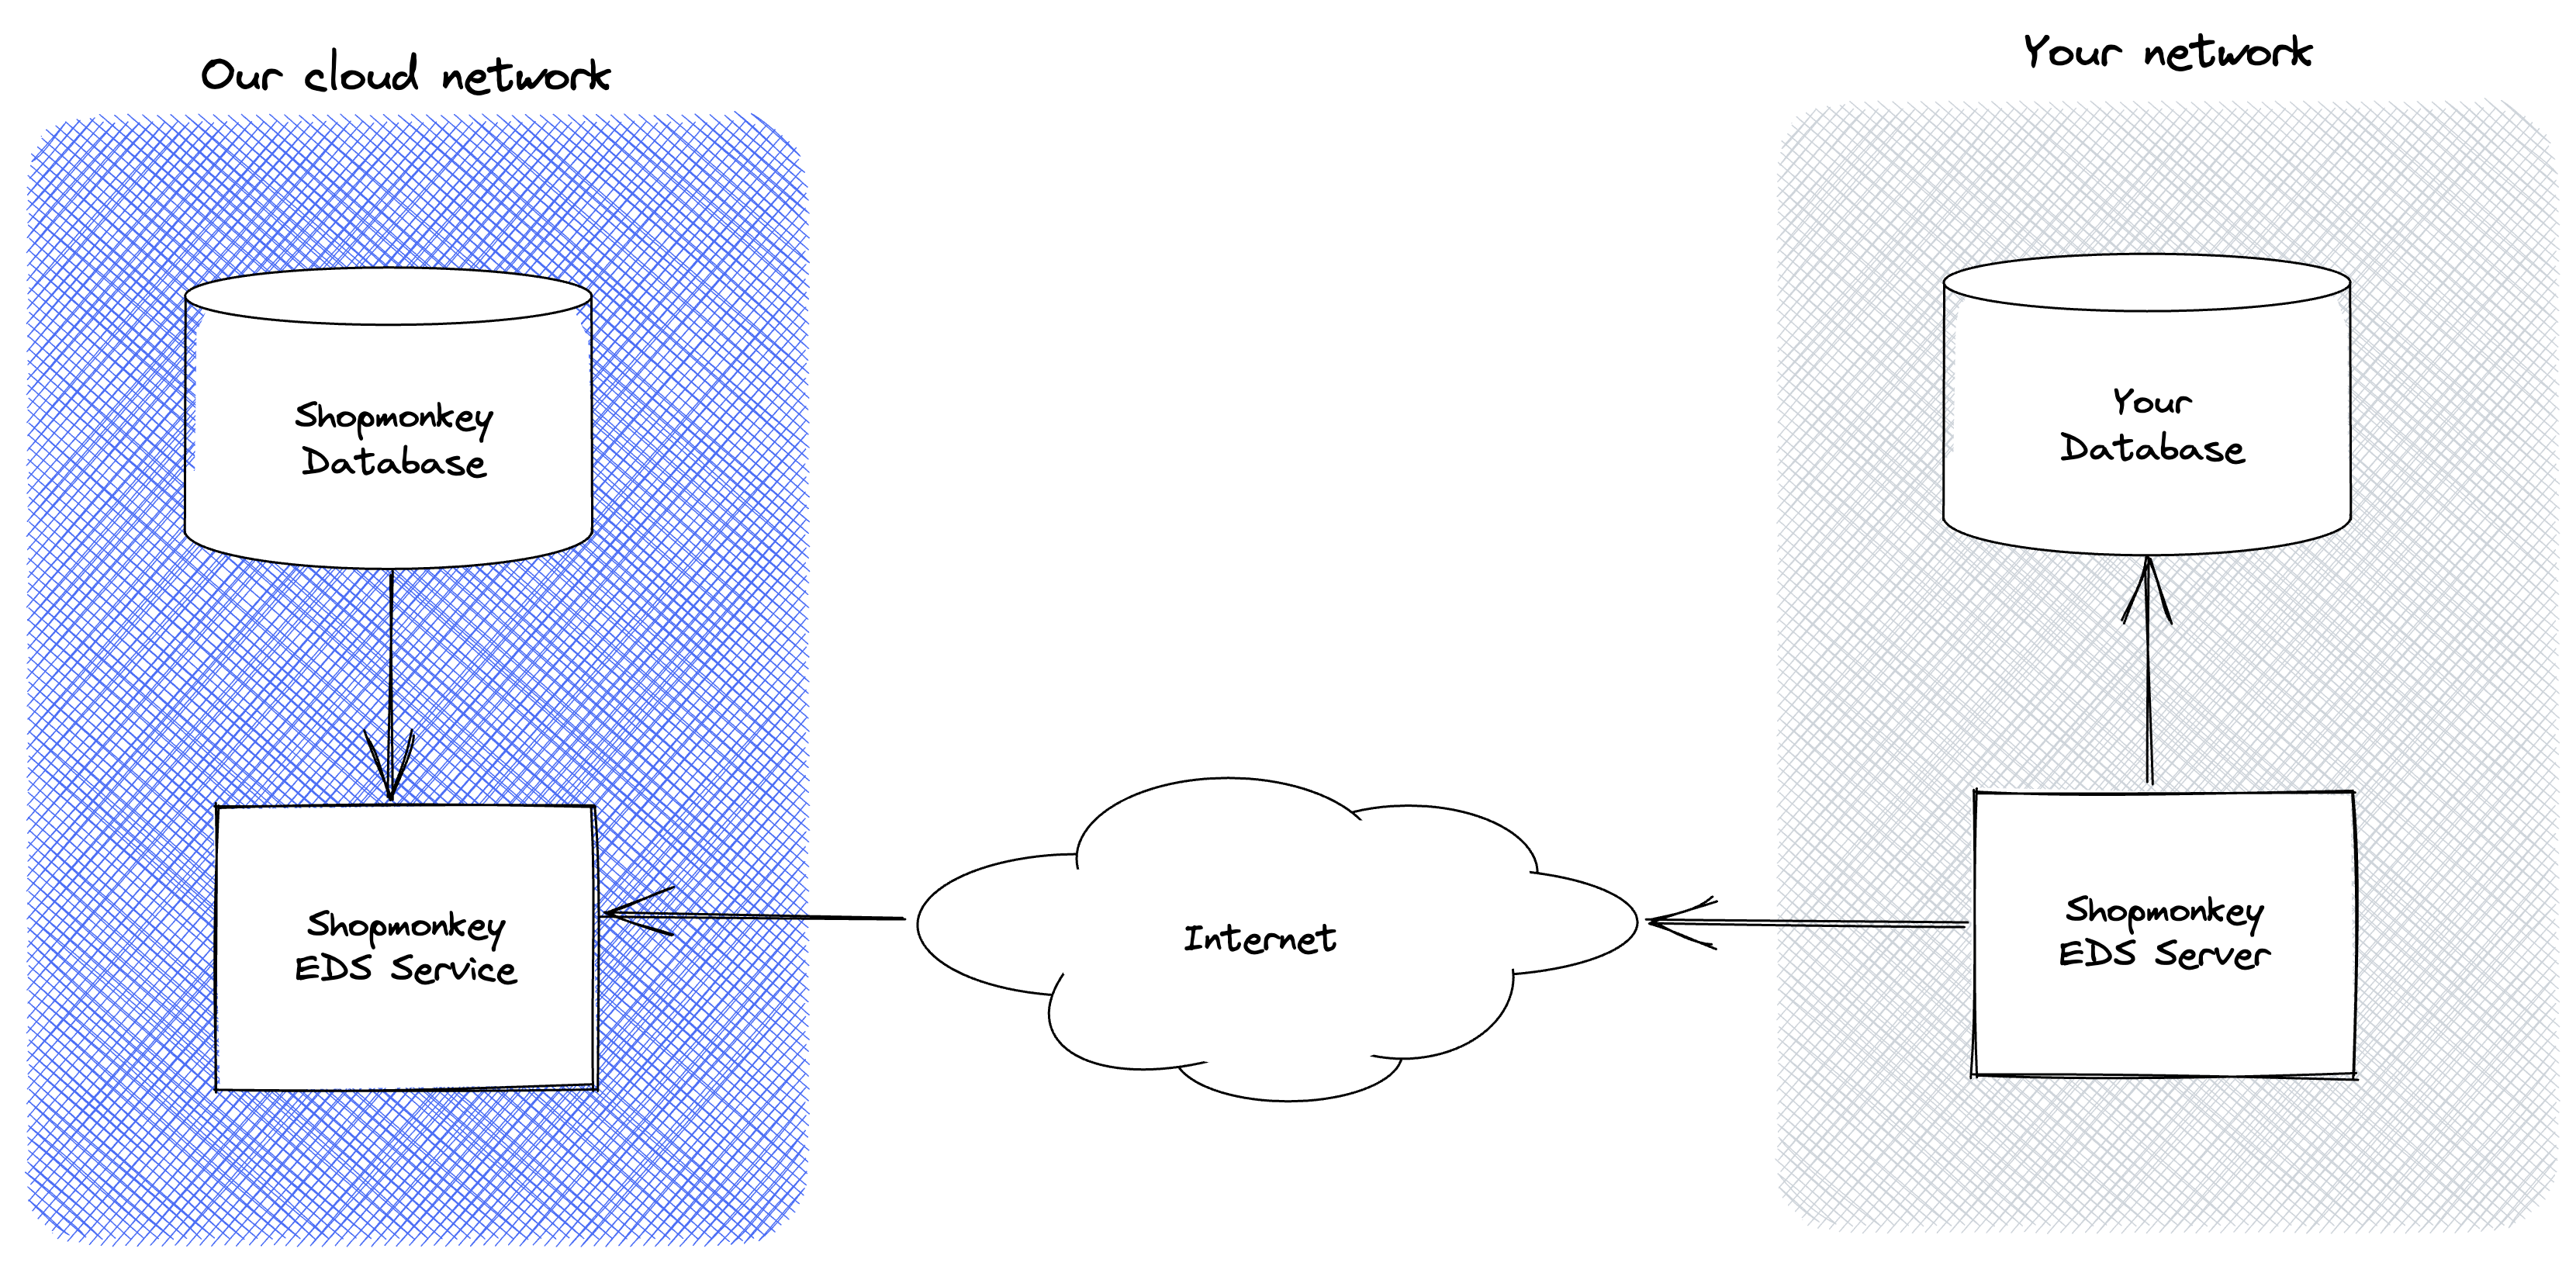
Our network runs the Shopmonkey infrastructure and the software that your shop uses when you access our software. You are responsible for running an instance of the EDS server in your network and under your control. The EDS server can run anywhere that can reach the Internet (a cloud provider, your own data center, your corporate IT network, etc). All communication between your EDS server and our network are encrypted using TLS. The EDS server can only communicate to our network and read data from your organization based on a private credential that you will be provided.
The EDS server will pull changes automatically when running. Database changes should typically arrive within 200ms or less. However, the latency depends on many factors including the latency between your EDS server and one of our cloud endpoints, your connection to your destination and the performance of the destination you're using, etc. Currently, the EDS service is not rate limited. However, we reserve the right to add rate limiting if we see specific issues which impact the overall quality of service.
Destination Support
The following destinations are currently supported:
- PostgreSQL (or CockroachDB or compatible PostgreSQL driver)
- Microsoft SQL Server
- Snowflake
- AWS S3 (or compatible S3 endpoint such as Google Cloud Storage)
- MySQL
- Microsoft Event Hub
- Apache Kafka
- File (useful for local development and testing)
However, we will accept Pull Requests for additional destinations. If you need assistance, please contact us.
Running the Server
Prerequisites
Before you can run the EDS server you will need to create and enroll your server using the Shopmonkey HQ application. In addition, your company must have the EDS entitlement provisioned and the user setting up EDS must have appropriate HQ permissions. If you are having issues accessing EDS inside HQ, please contact Support. If you are interested in using EDS, please contact Sales.
Security
Transport
When using EDS, the communication is one-way from our network to your network and all data is transmitted fully encrypted end-to-end using TLS.
PII
Personally Identifiable Information (or "PII" for short) data in the database is tokenized. For example, email addresses will not be provided in clear text and will instead have an opaque token such as 1234-5678-90ab-cdef-ghij. For any PII fields that you would like to decode, you must use the API for that endpoint to decode that data directly. The reason is that we do not store PII data in our database and use a third-party secure data vault to protect your data and the data for your customers.
For example, to decode the email for a Customer from the database, you can use the id from the record and use the Find Customer API to fetch the emails in plain text. When using the API, the data is automatically decoded from the data vault on-the-fly.
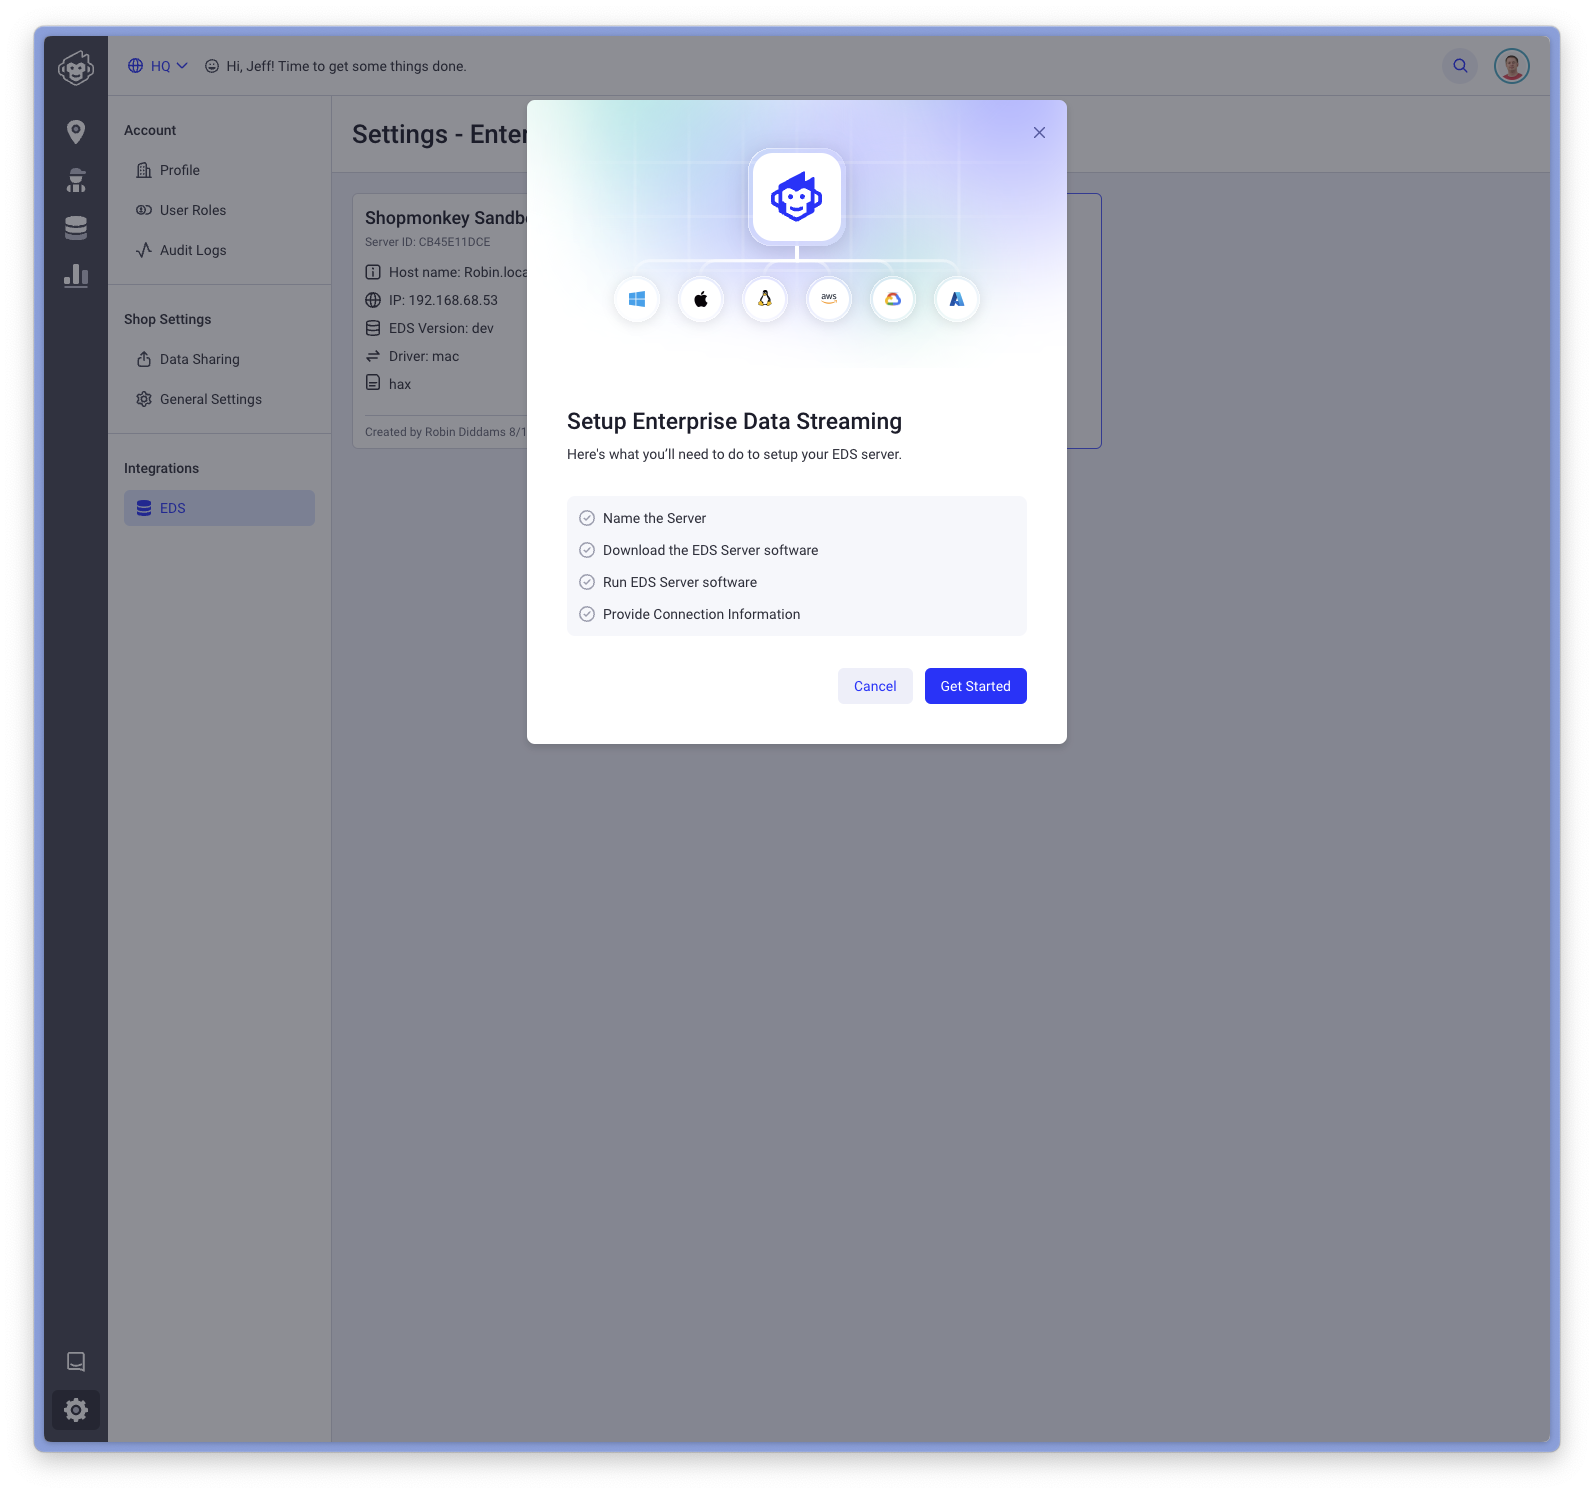
Setup from HQ
Navigate to Integrations > HQ menu item and select the "New Server" tile button:
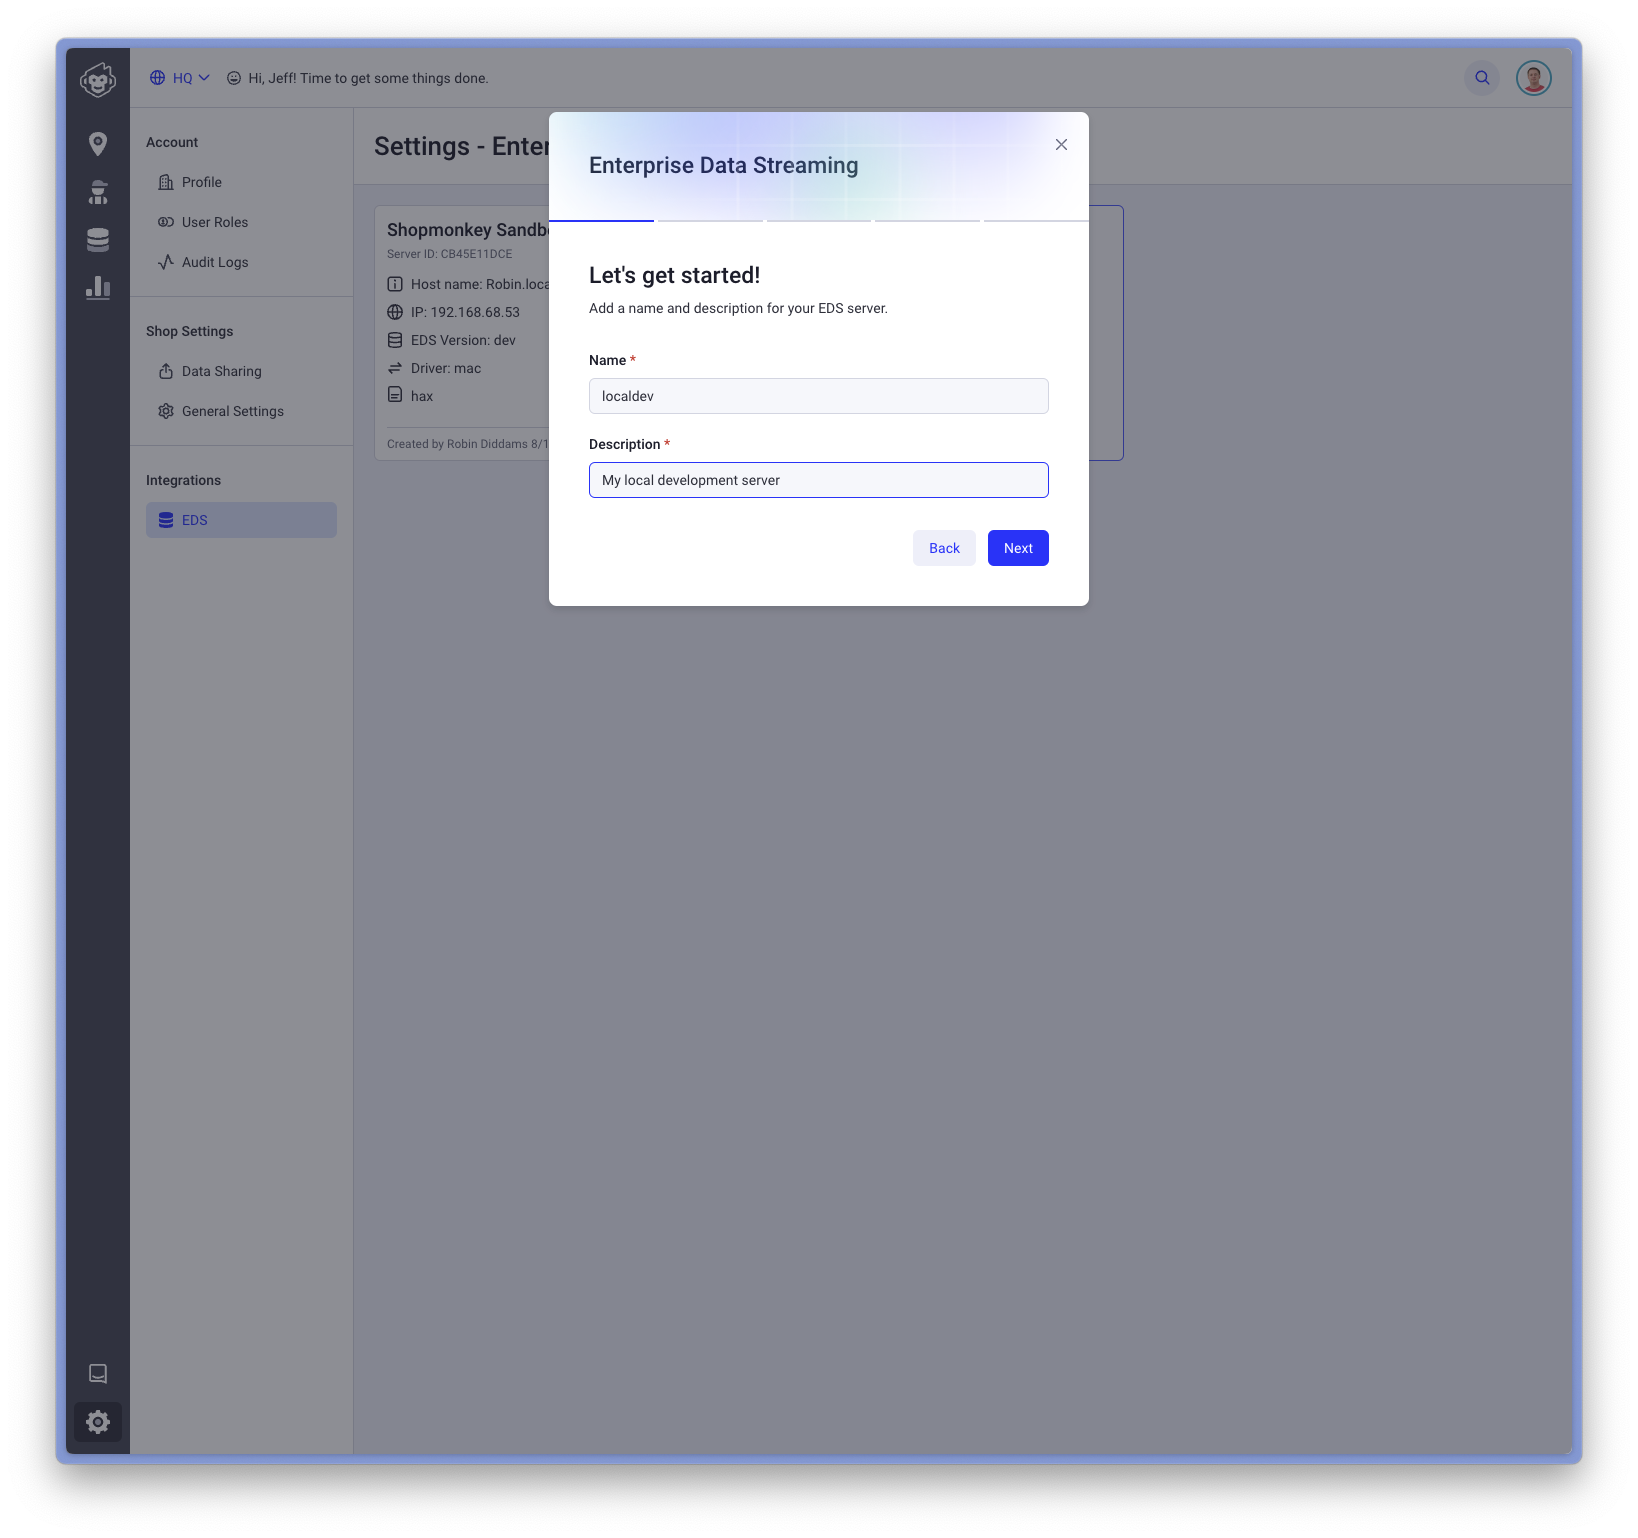
Enter a name of your server and give it a description to help distinguish between others:
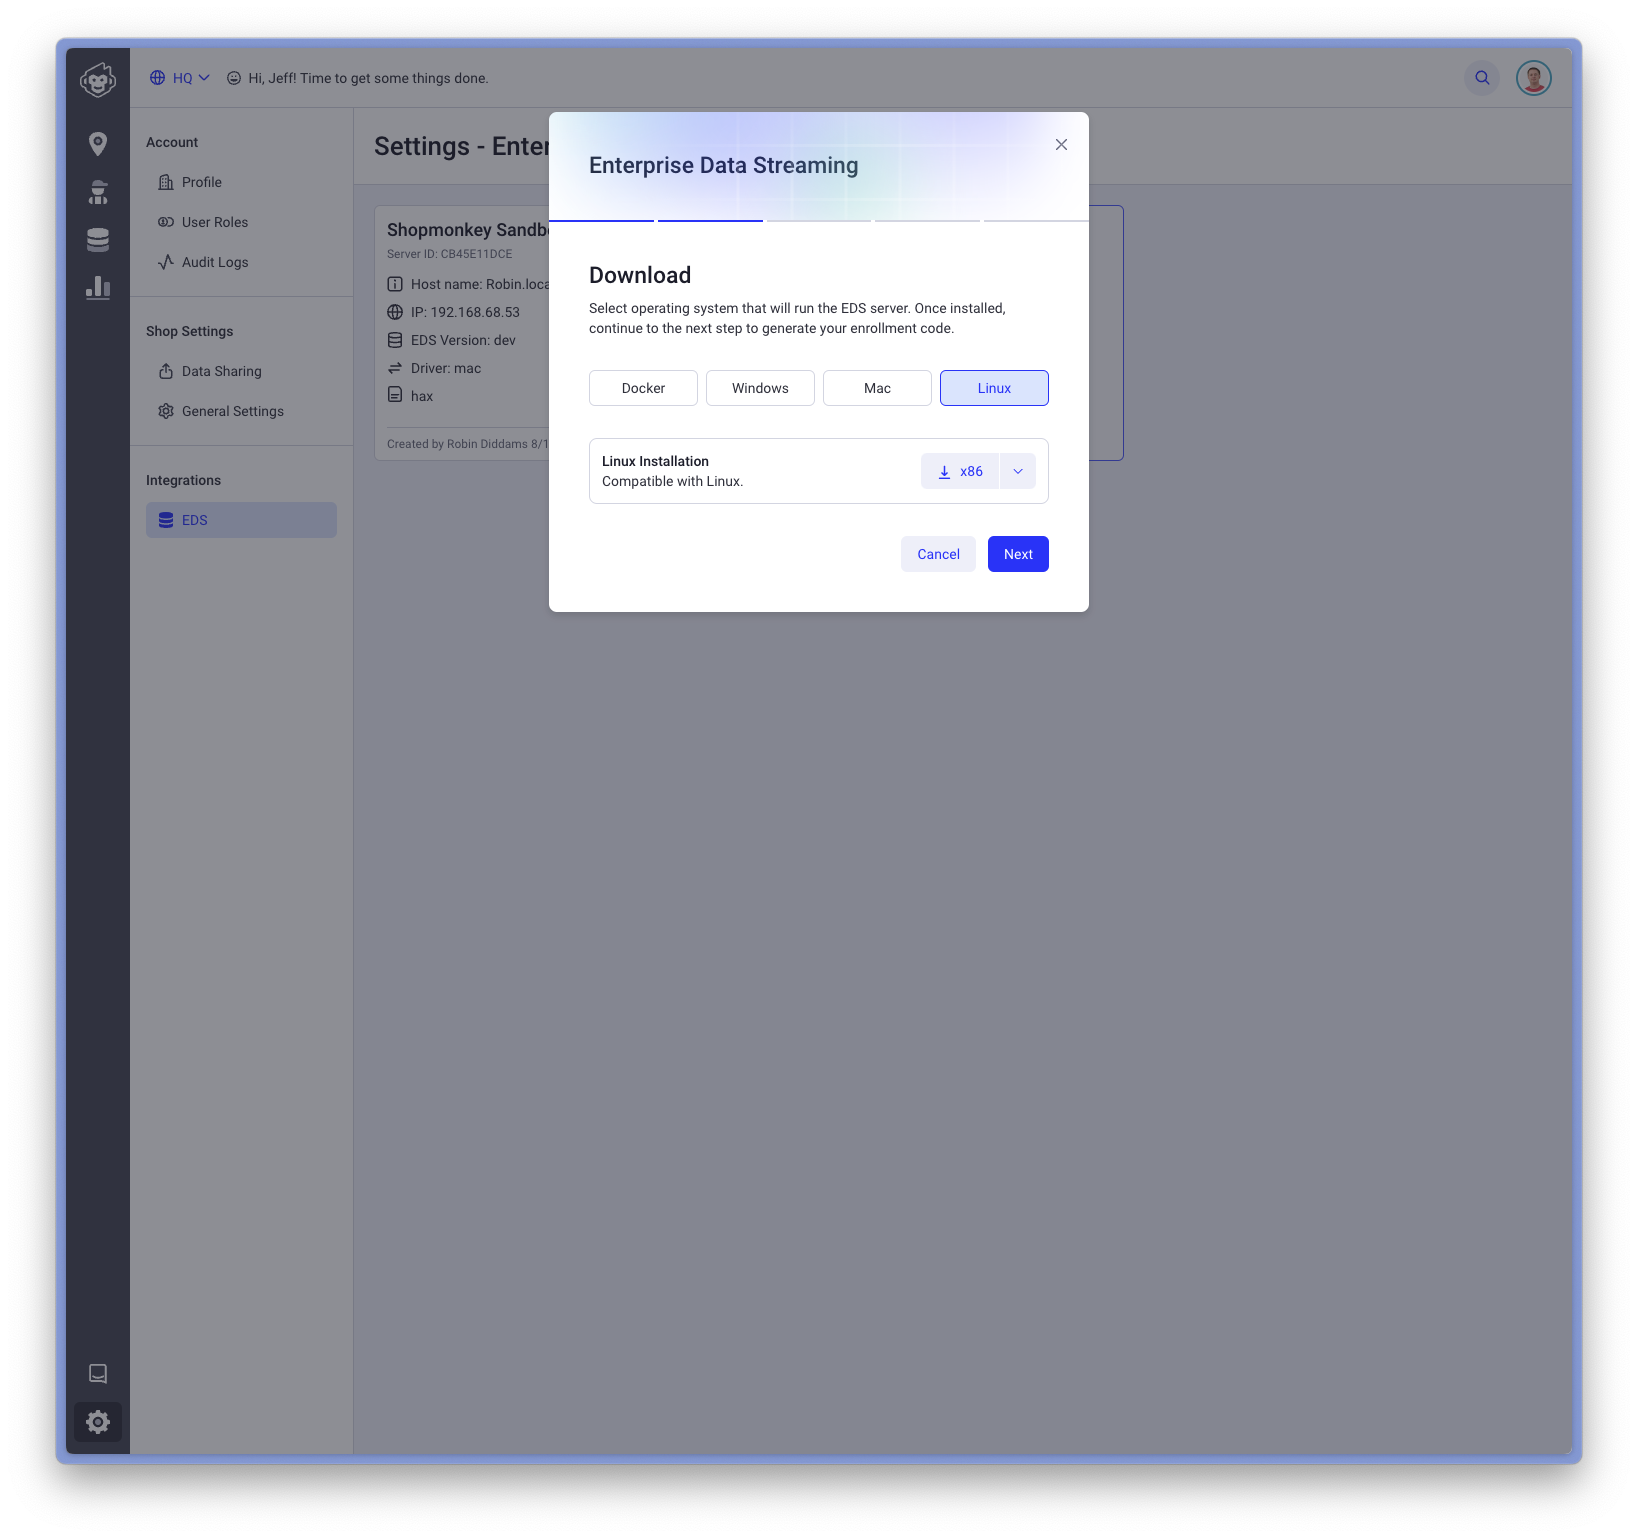
Select your operating system that the server will run and click download:
You'll need to run the command provided and use the provided enrollment code:
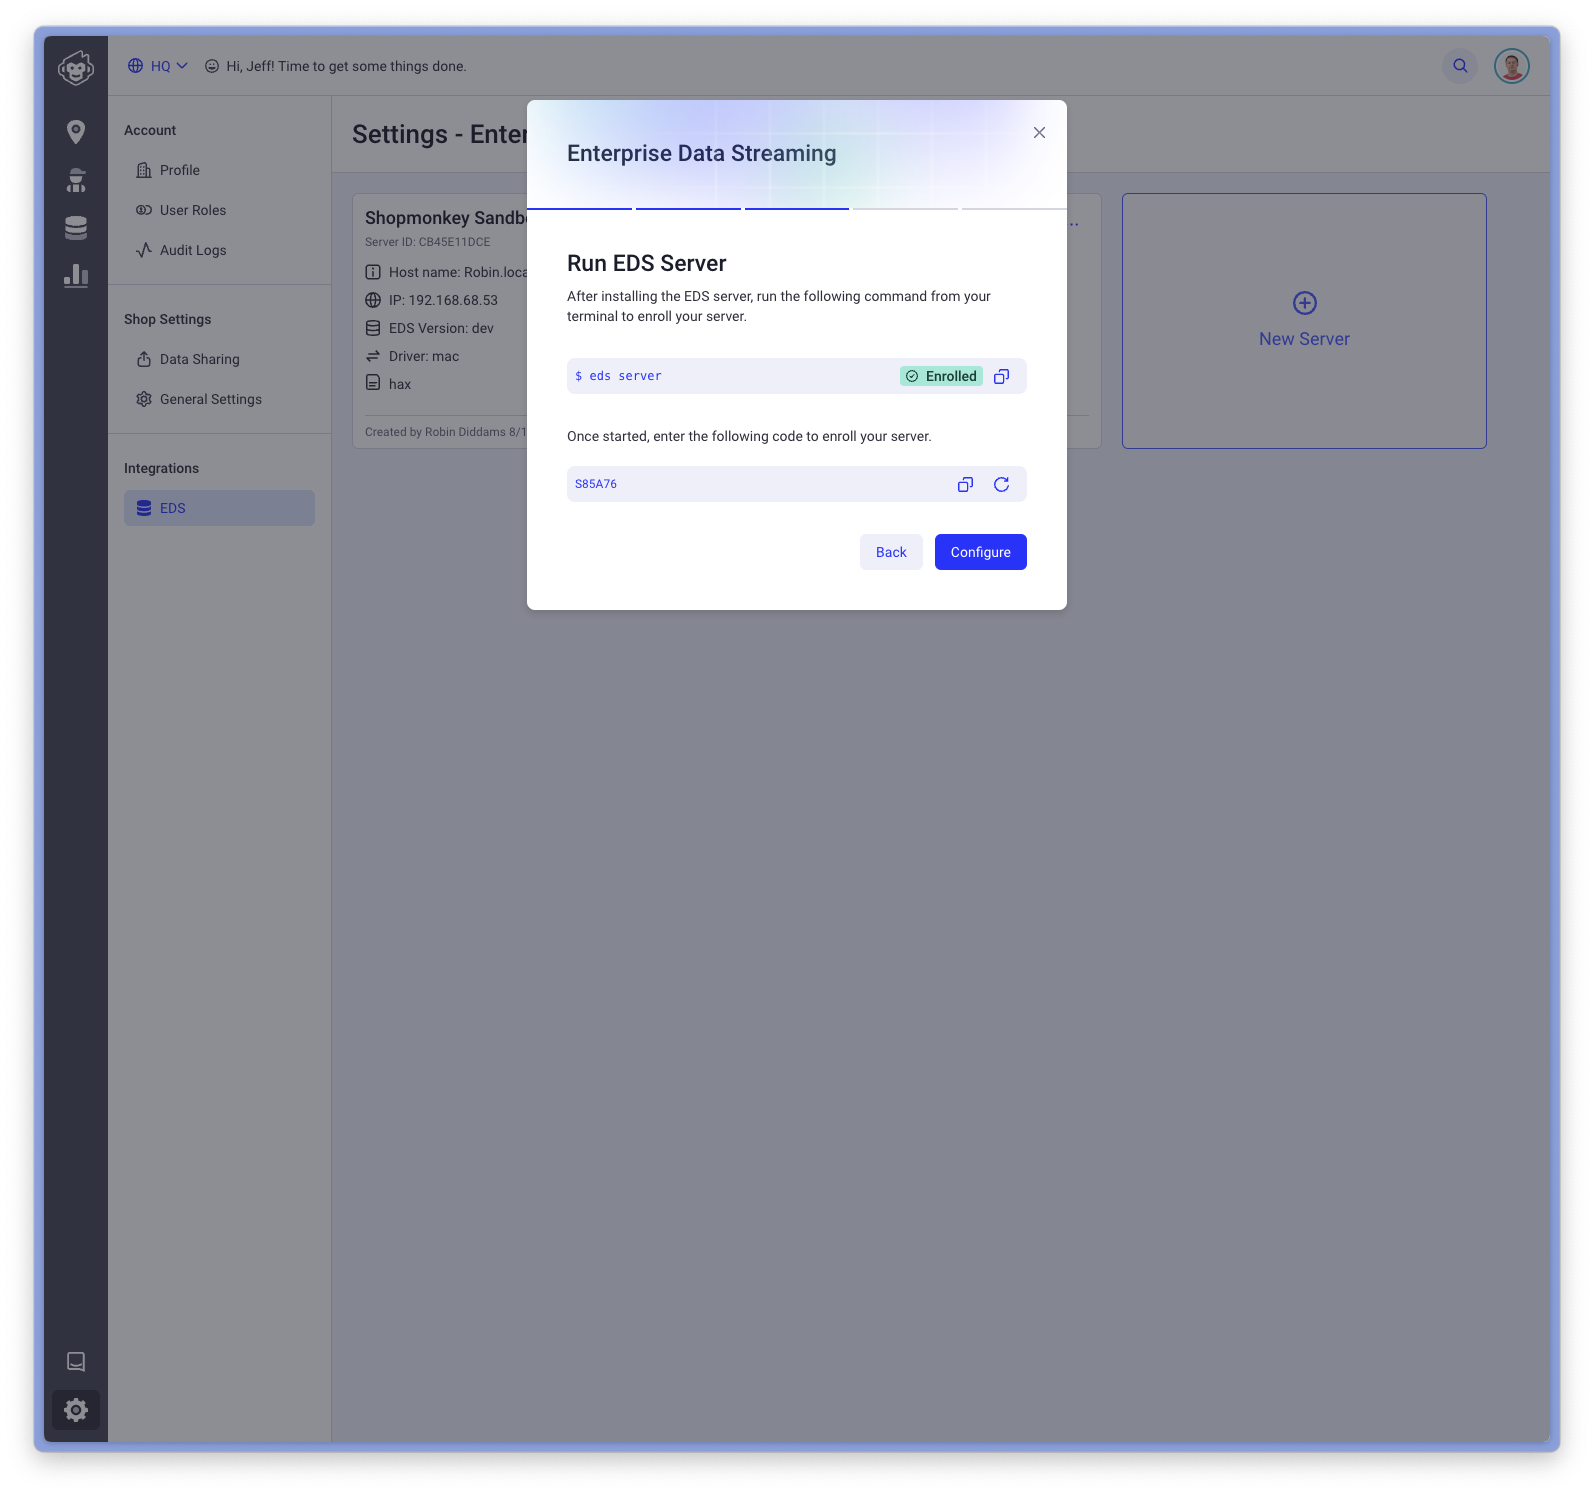
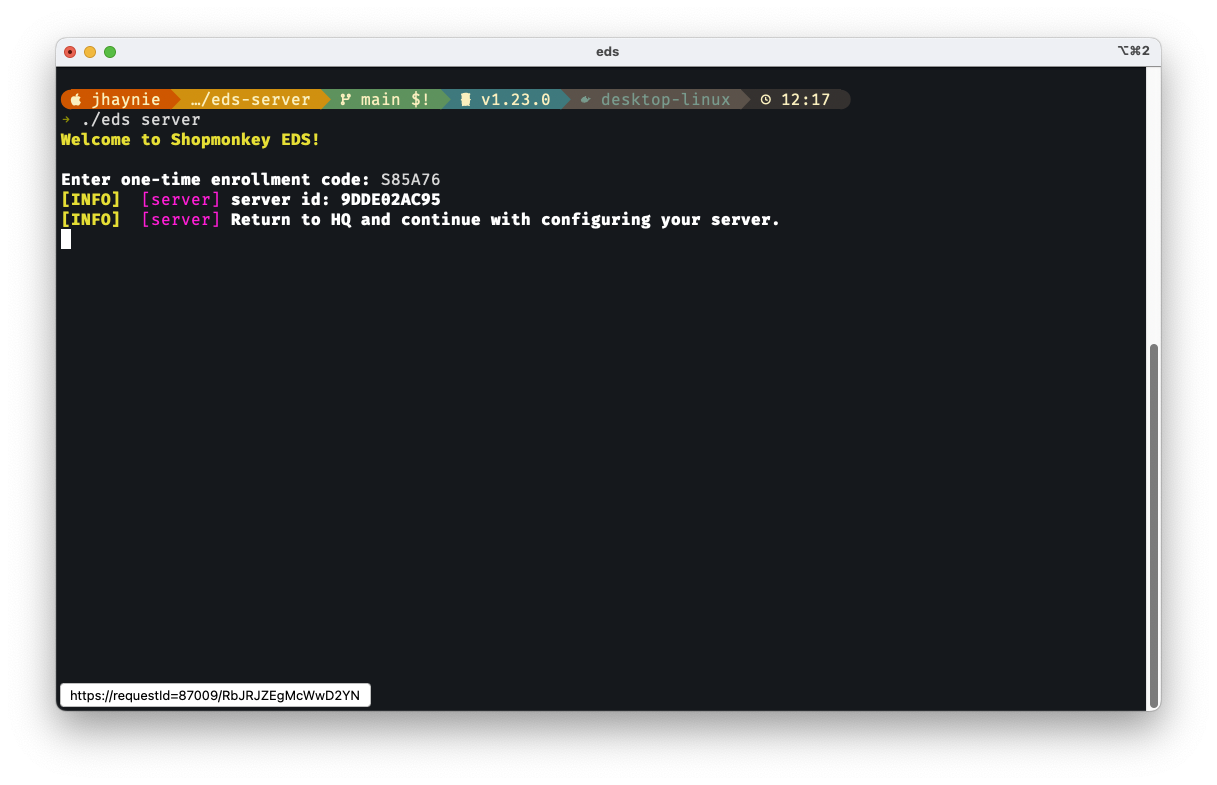
In your terminal of the system that you downloaded the server, run the following command and enter the enrollment code displayed:
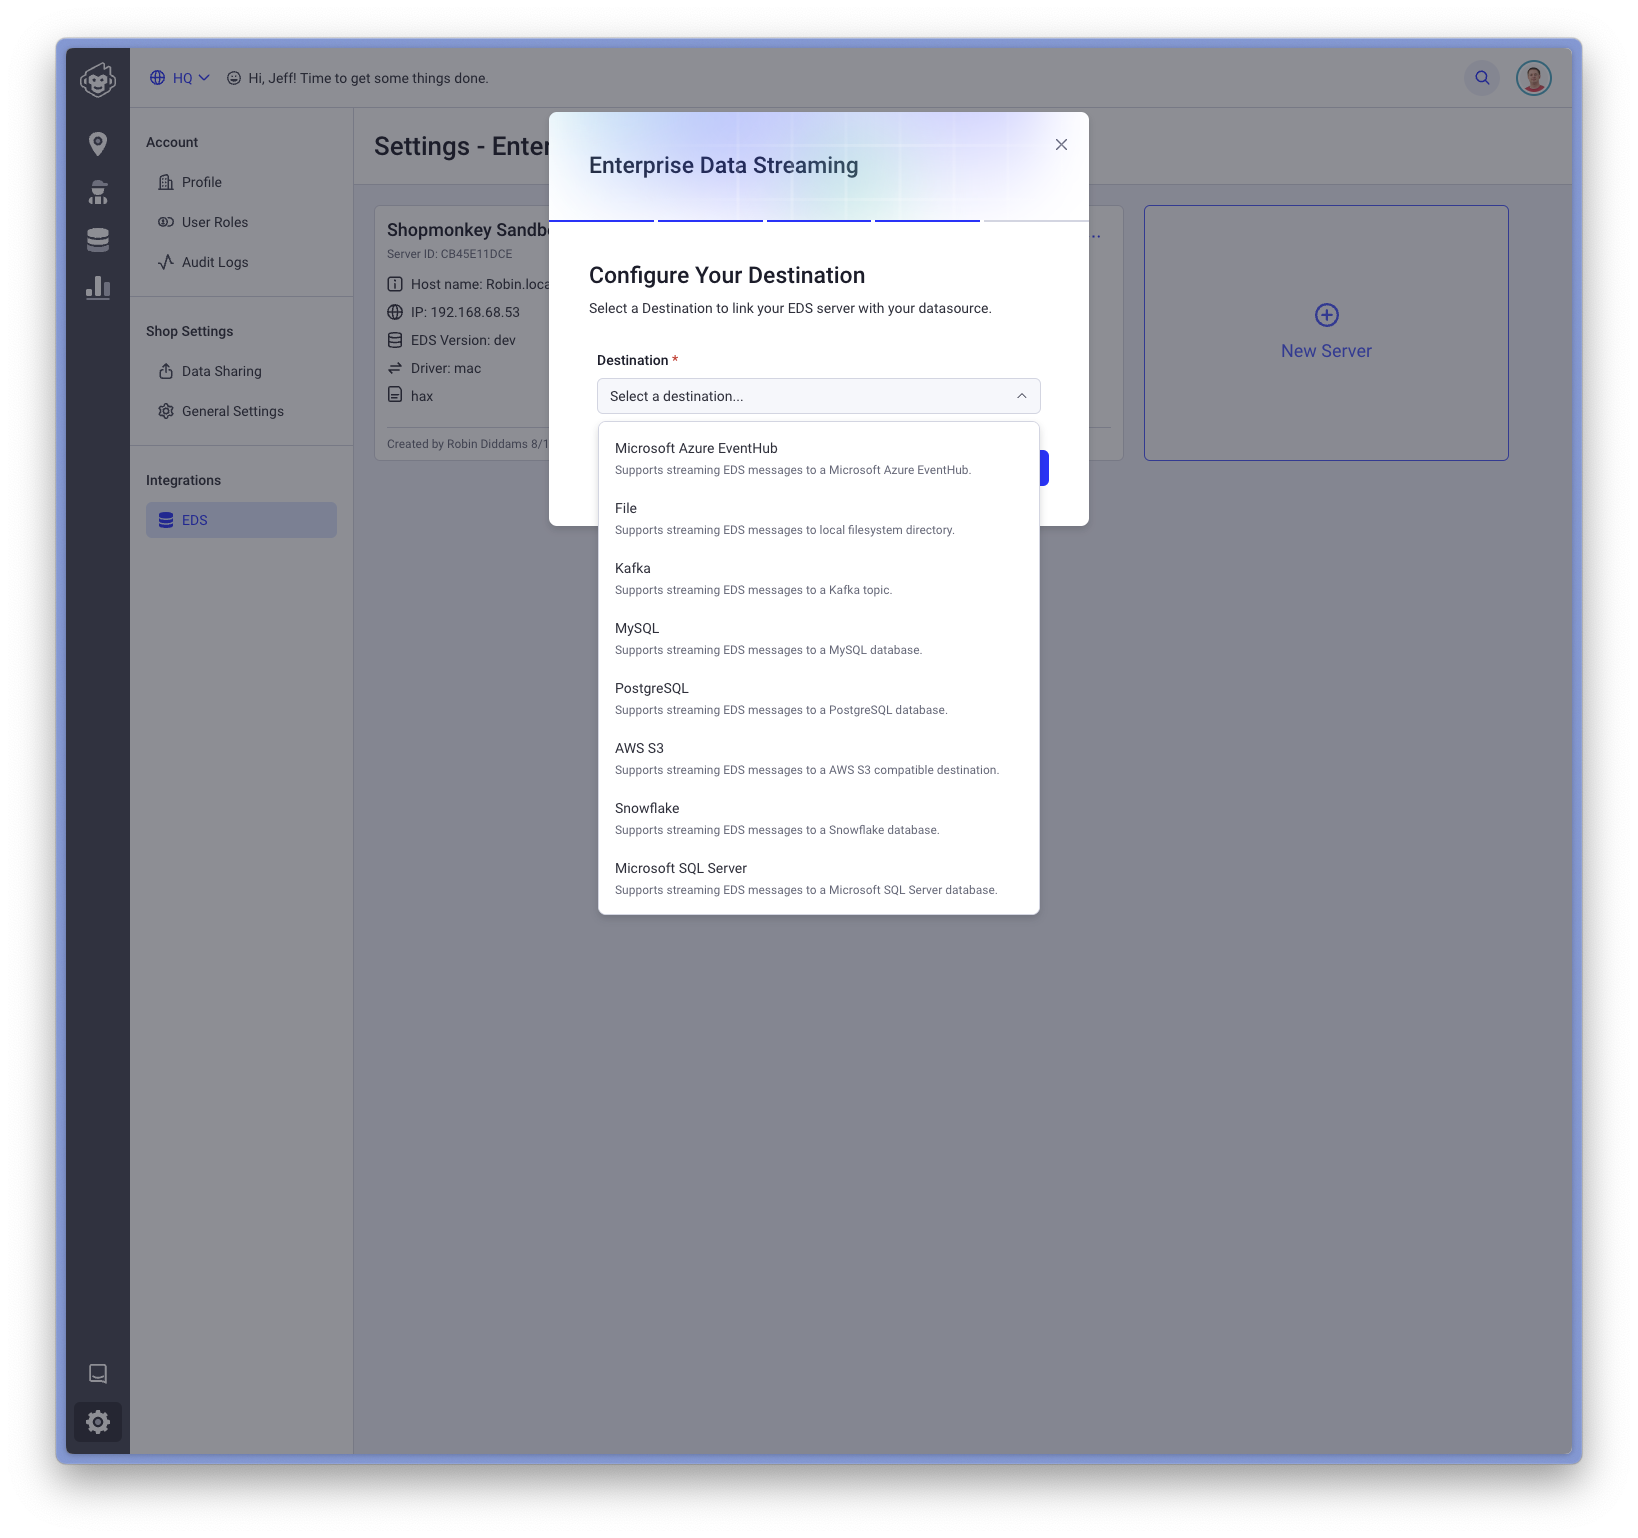
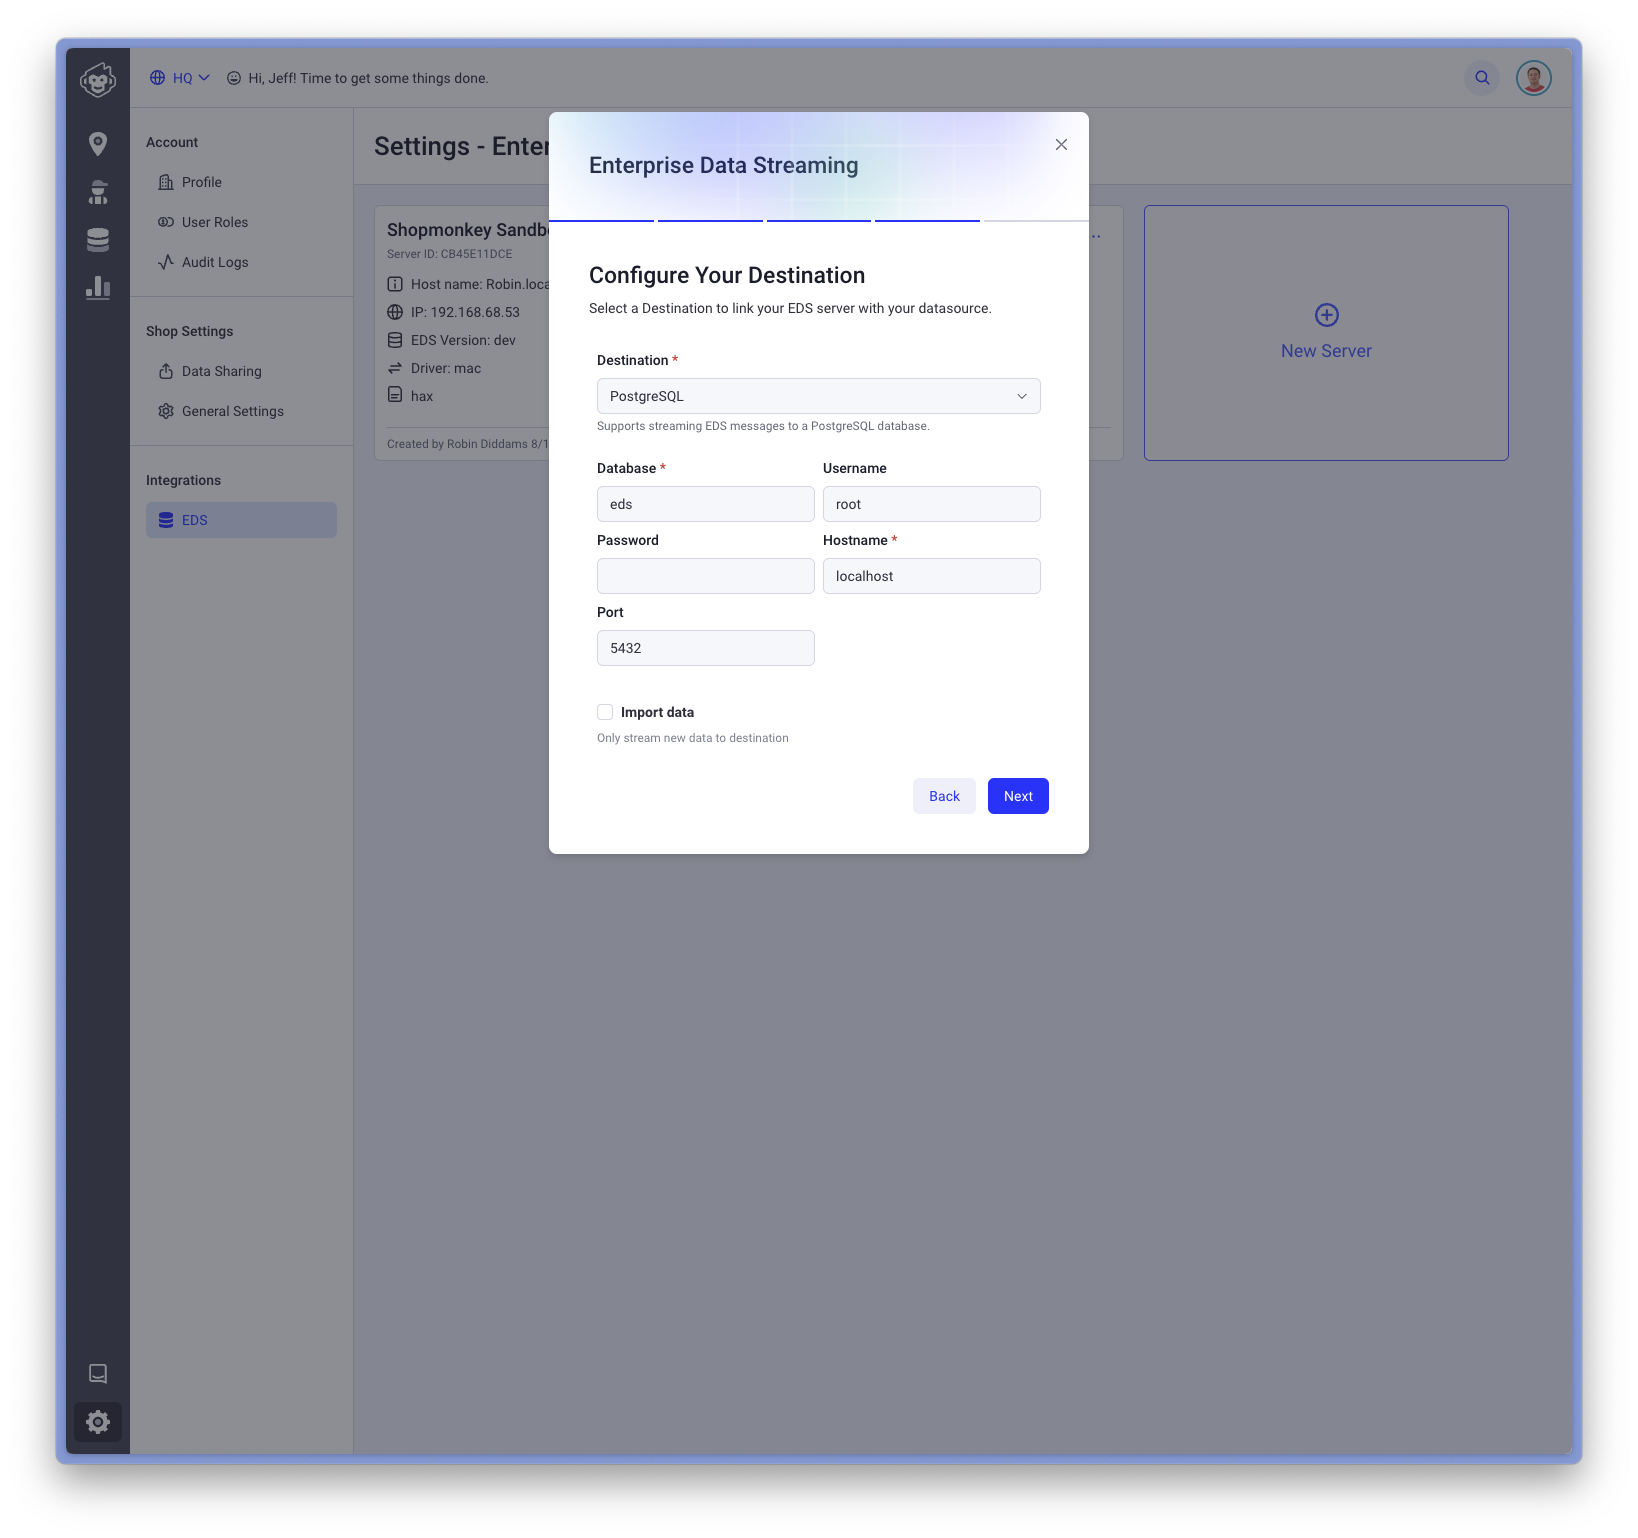
Select your destination:
Enter configuration information for your destination. If you would like to backfill all the data in Shopmonkey to your destination, make sure you check the checkbox for Import Data:
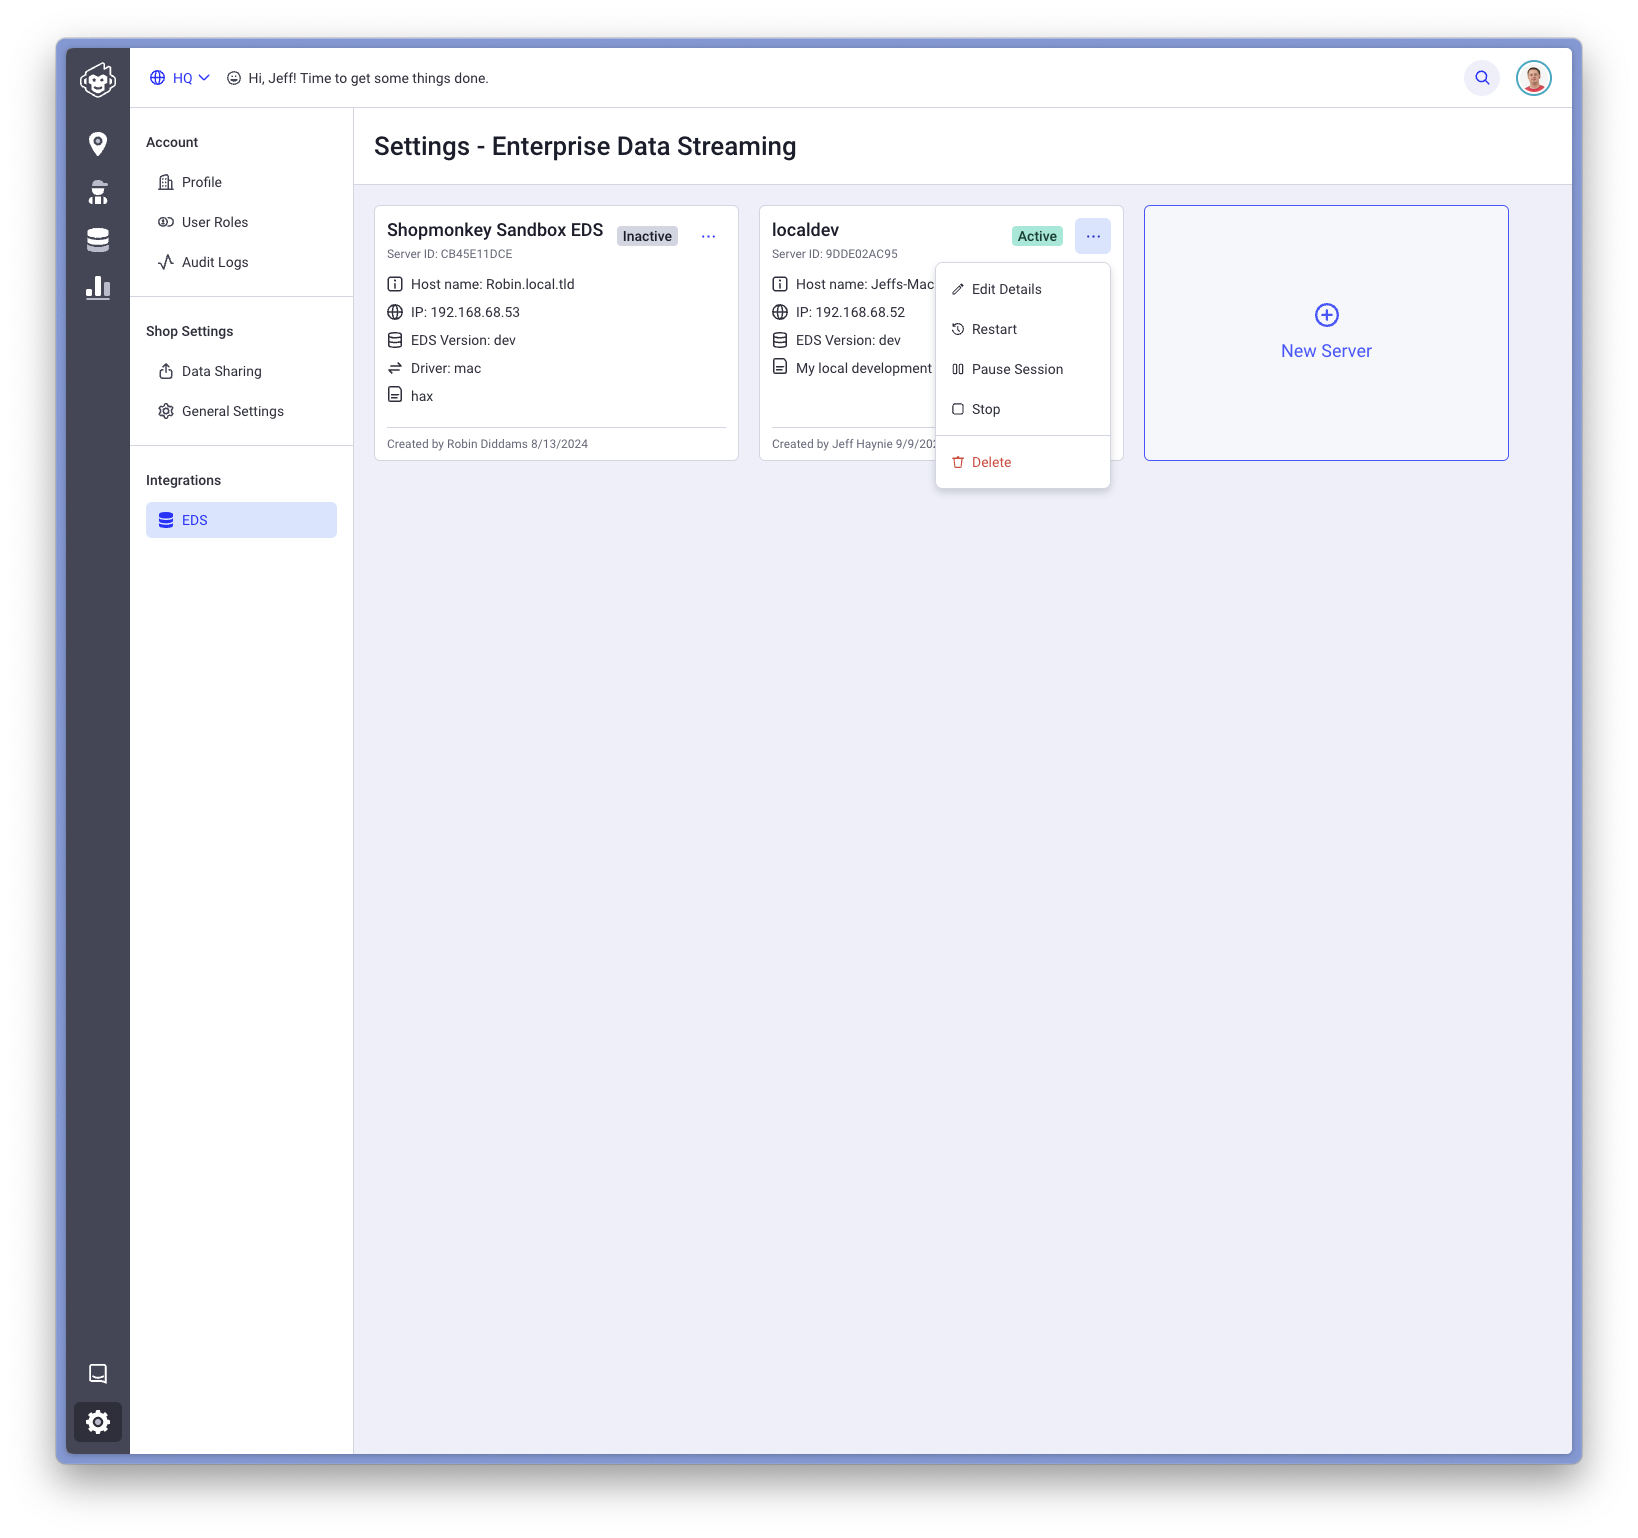
Once your server is running, you click the tile to get more detailed run time information about your server:
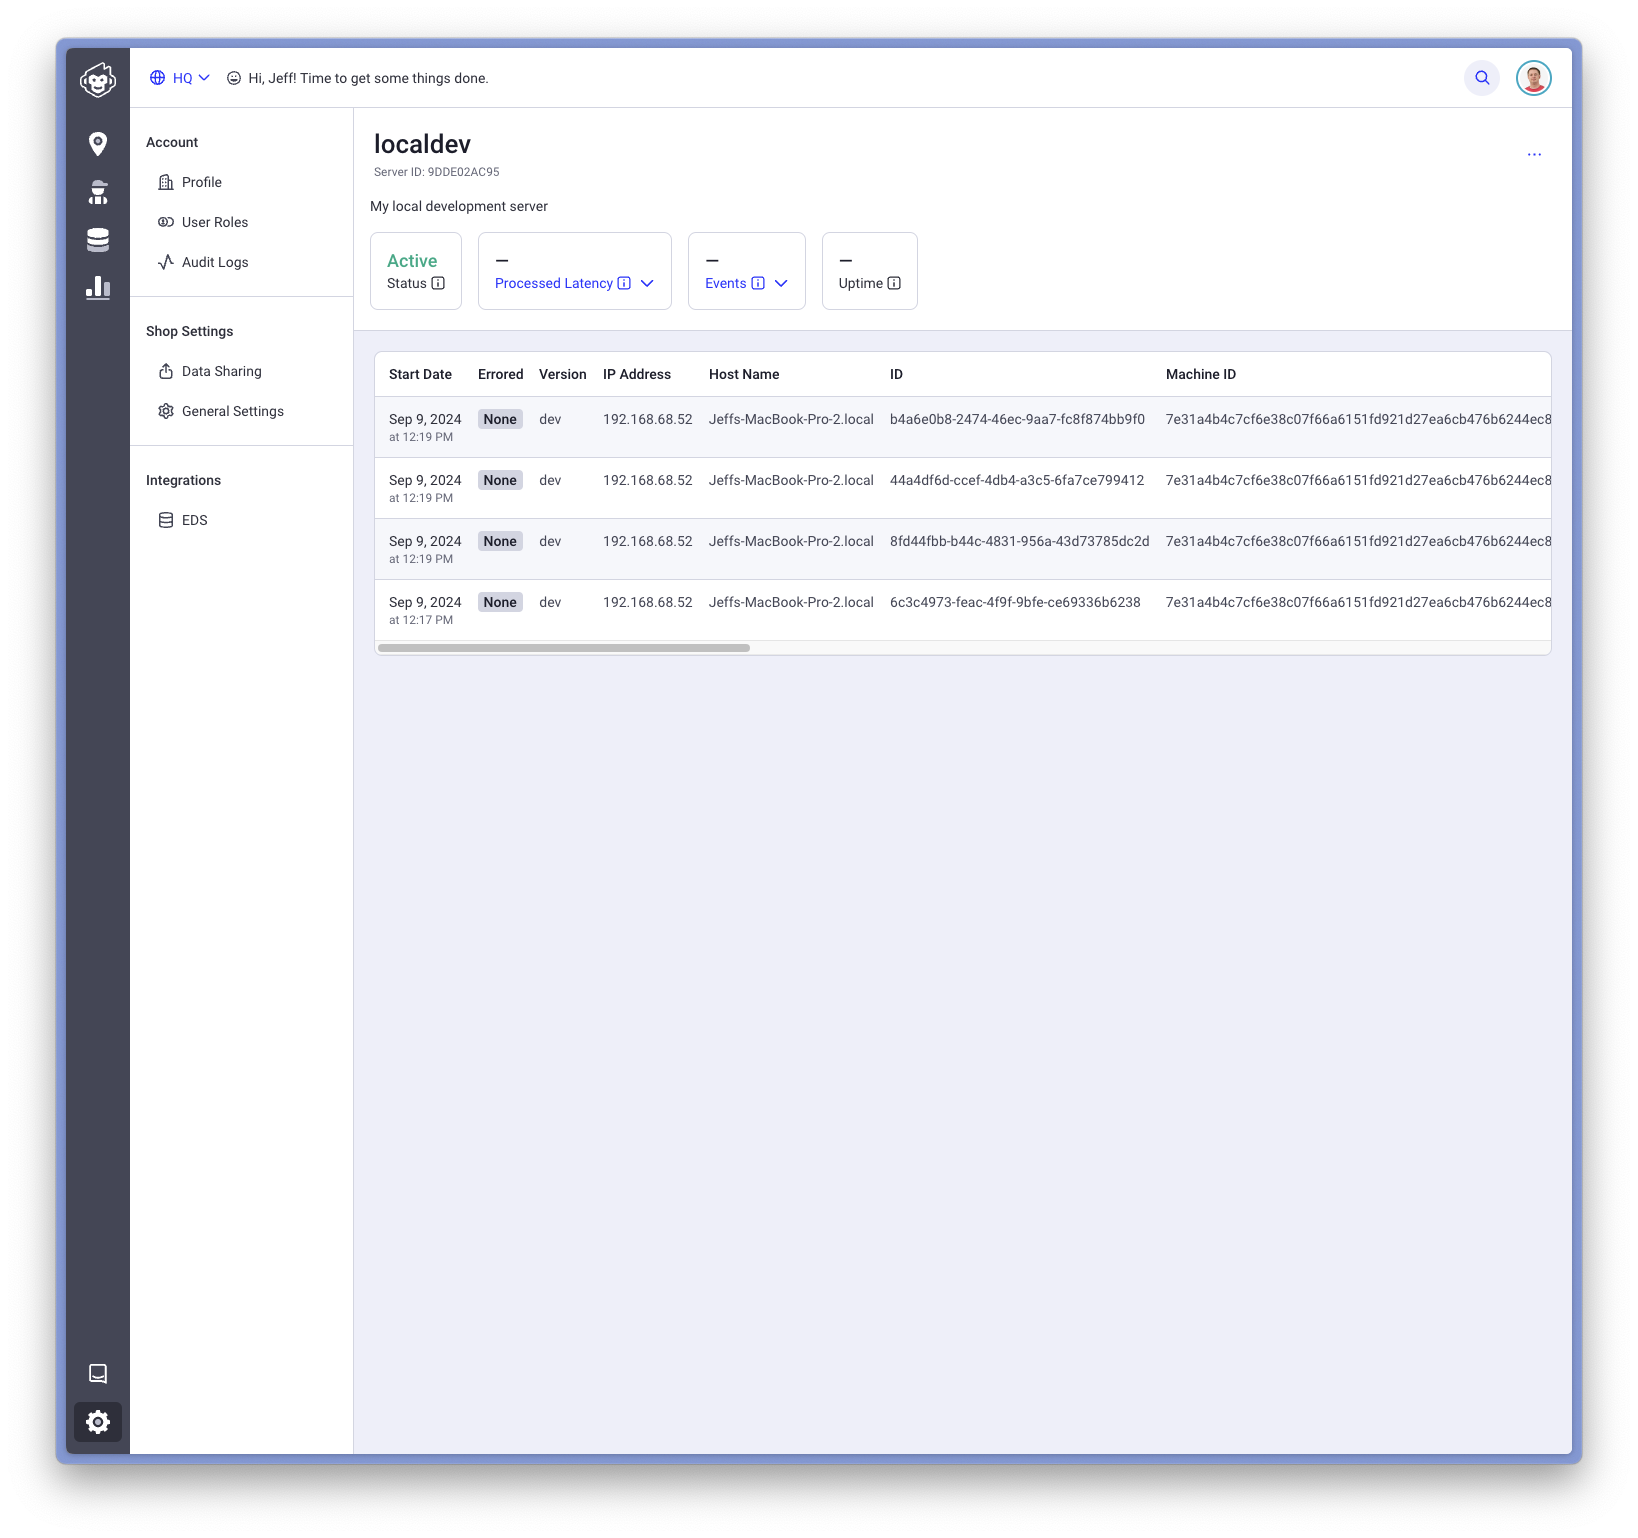
You can now control your server from the tile or the context menu in the detail screen: