Overview
The Shopmonkey API is based on the REST standard. When you make a request to the REST API, you will specify an HTTP method and a path. Additionally, you might also specify request headers and path, query, or body parameters. The API will return the response status code, response headers, and potentially a response body.
The REST API reference documentation describes the HTTP method, path, and parameters for every operation. It also displays example requests and responses for each operation.
API Base URL
https://api.shopmonkey.cloud
Versioning
The Shopmonkey API is versioned and this version is part of the URL for the APIs.
The current version of the API is v3 and will be the first part of the path for any URL.
API Version Base URL
https://api.shopmonkey.cloud/v3
Authentication
To access the endpoints within the Shopmonkey API, authentication is mandatory. This guide explains the authentication mechanisms available. Shopmonkey employs OAuth Bearer Tokens as a method for authenticating API requests.
Authentication with the Shopmonkey API is facilitated through OAuth 2.0 using a bearer token.
Making API requests without authentication or with an incorrect key results in a 401 HTTP status error, while requests with valid keys but insufficient permissions yield a 403 HTTP status error. It's mandatory to make all API requests over HTTPS, as requests over plain HTTP are rejected.
Don't store your Shopmonkey API Keys in GitHub or any other source control system, and make sure they are not accessible to unauthorized users or environments! Treat your API Key like a critical password since it gives the user full access to your account and data.
Creating a API Token in Shopmonkey
It's only a few steps to create an API Key in Shopmonkey. These steps can be followed in either the main app or HQ. Only Admins can create API Keys in Shopmonkey.
-
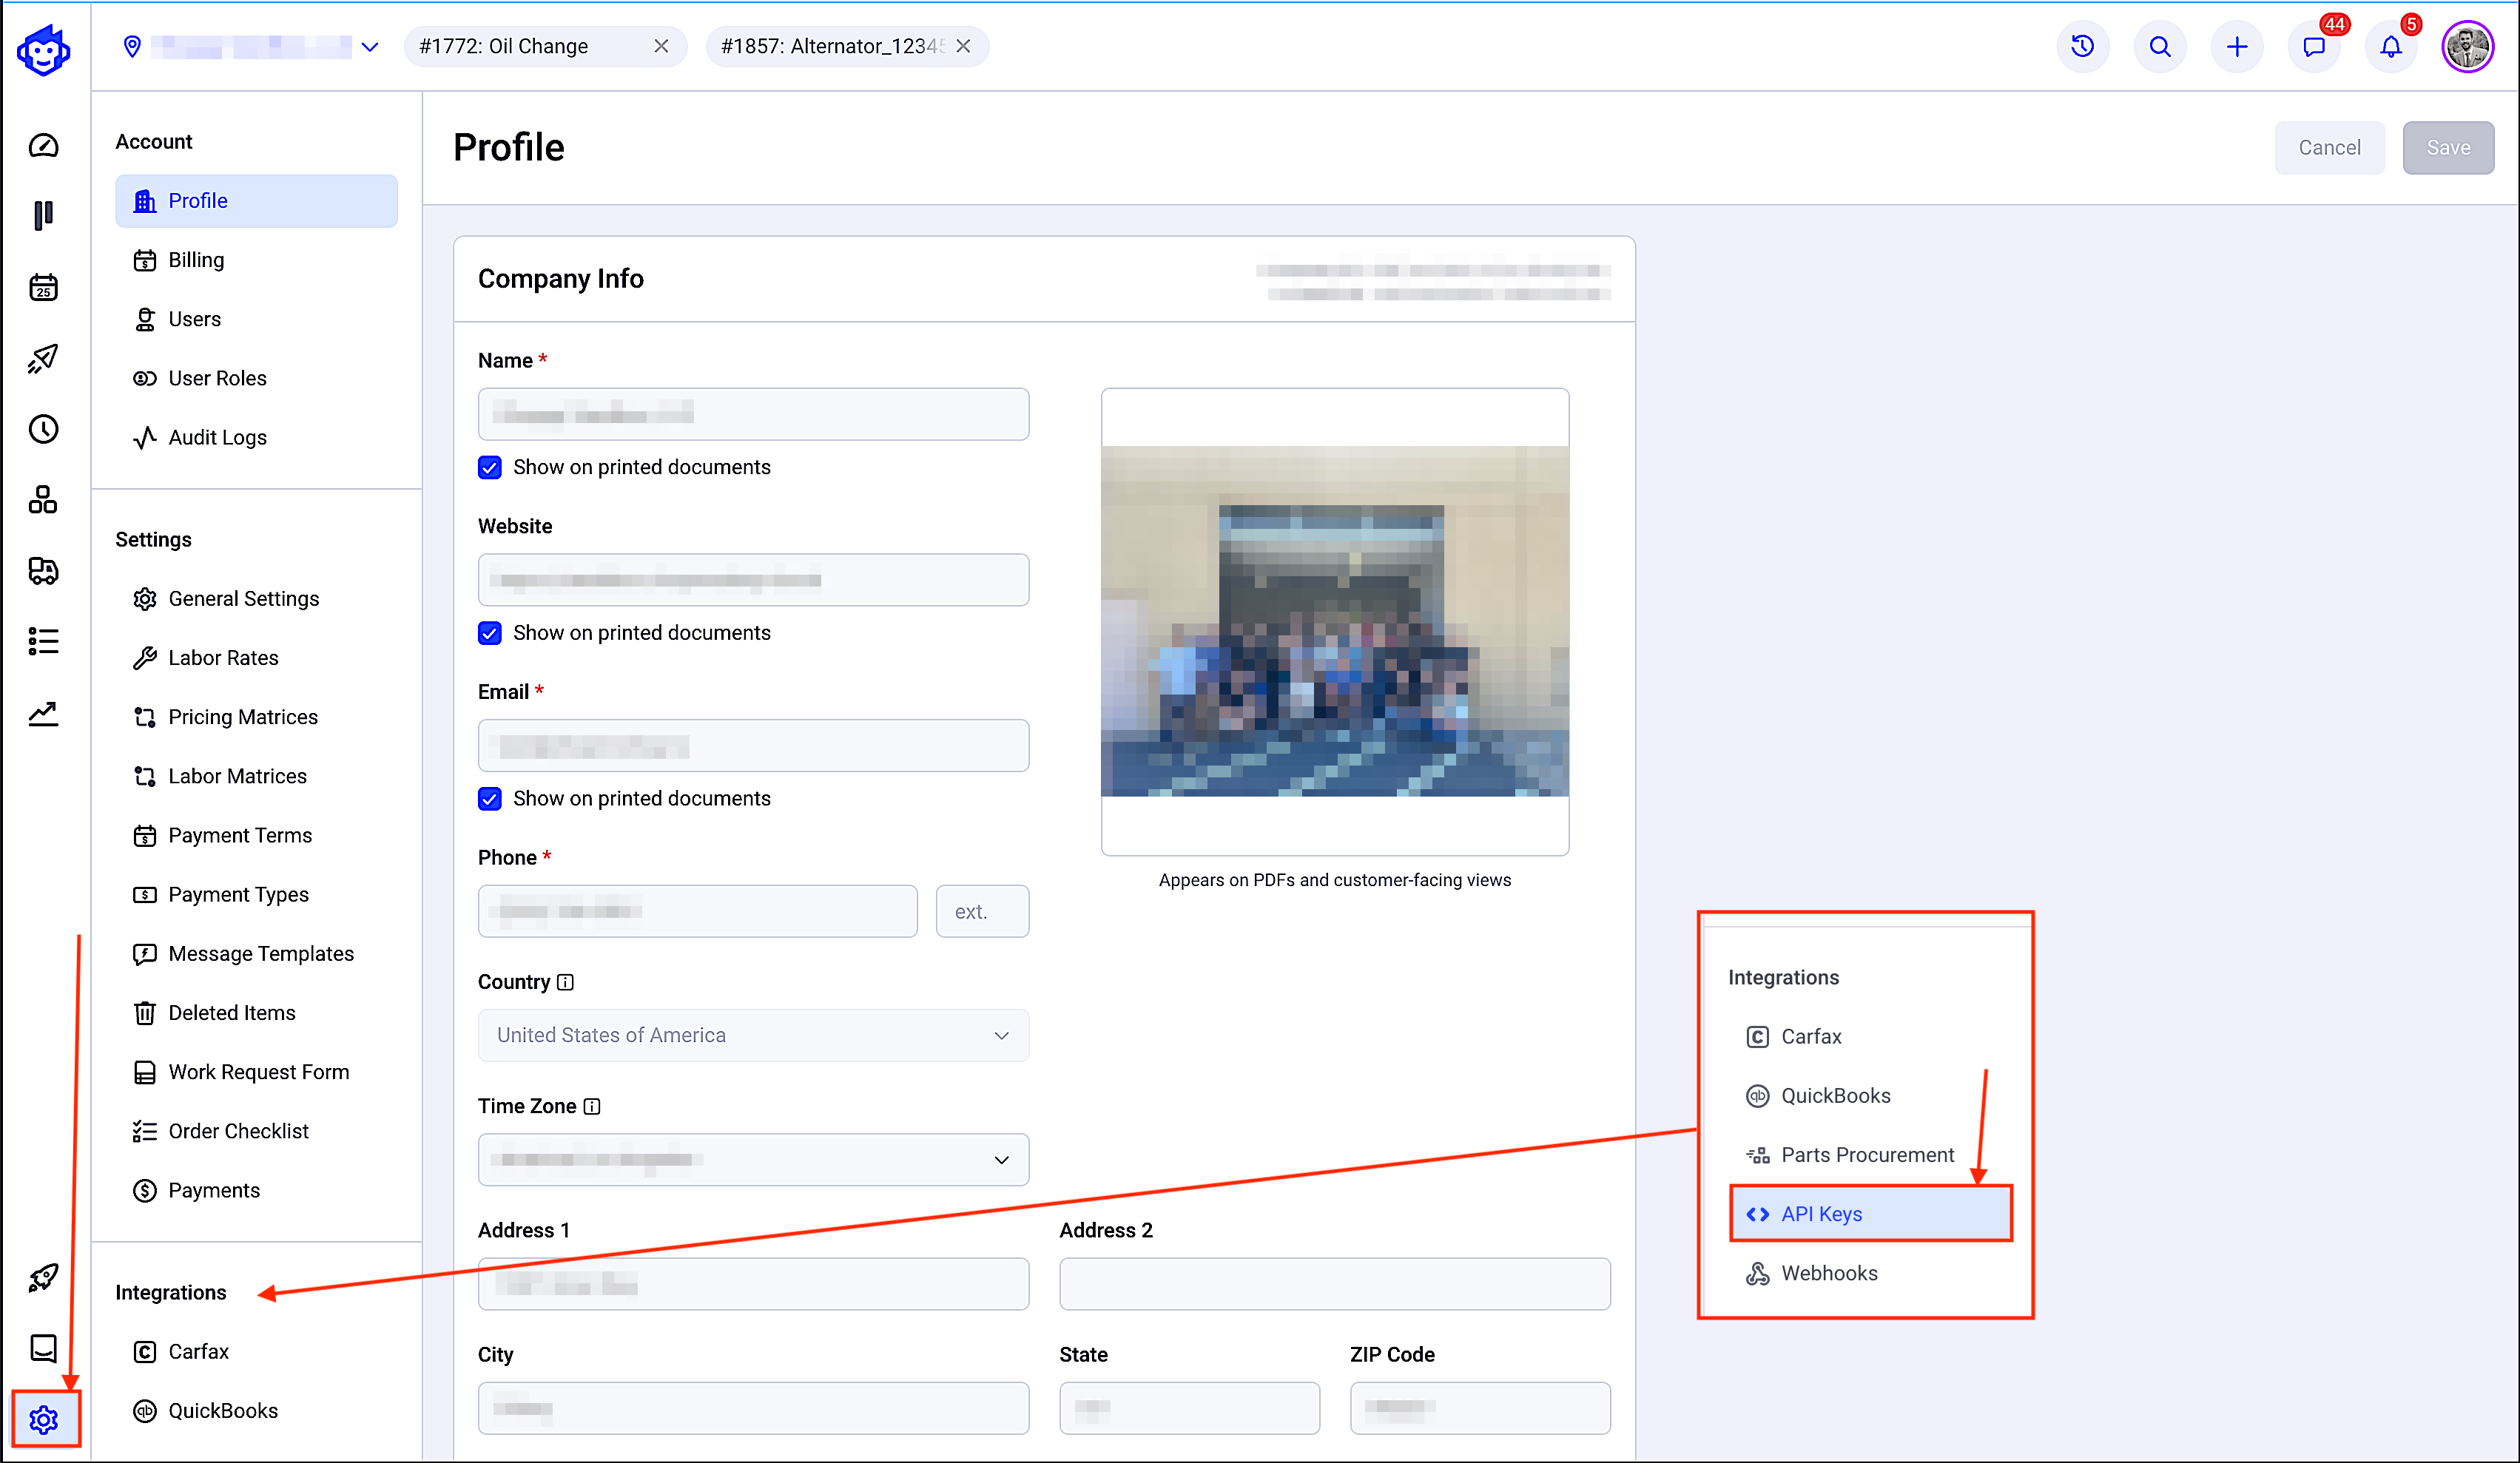
Navigate to Settings > Integration > API Keys
- Log into your account.
- Navigate to the Settings section.
- Locate the Integration section, then select API Keys.
-
Click Get Started or Add New Key
If no keys exist, you’ll see a Get Started button. Otherwise, click Add New Key to proceed.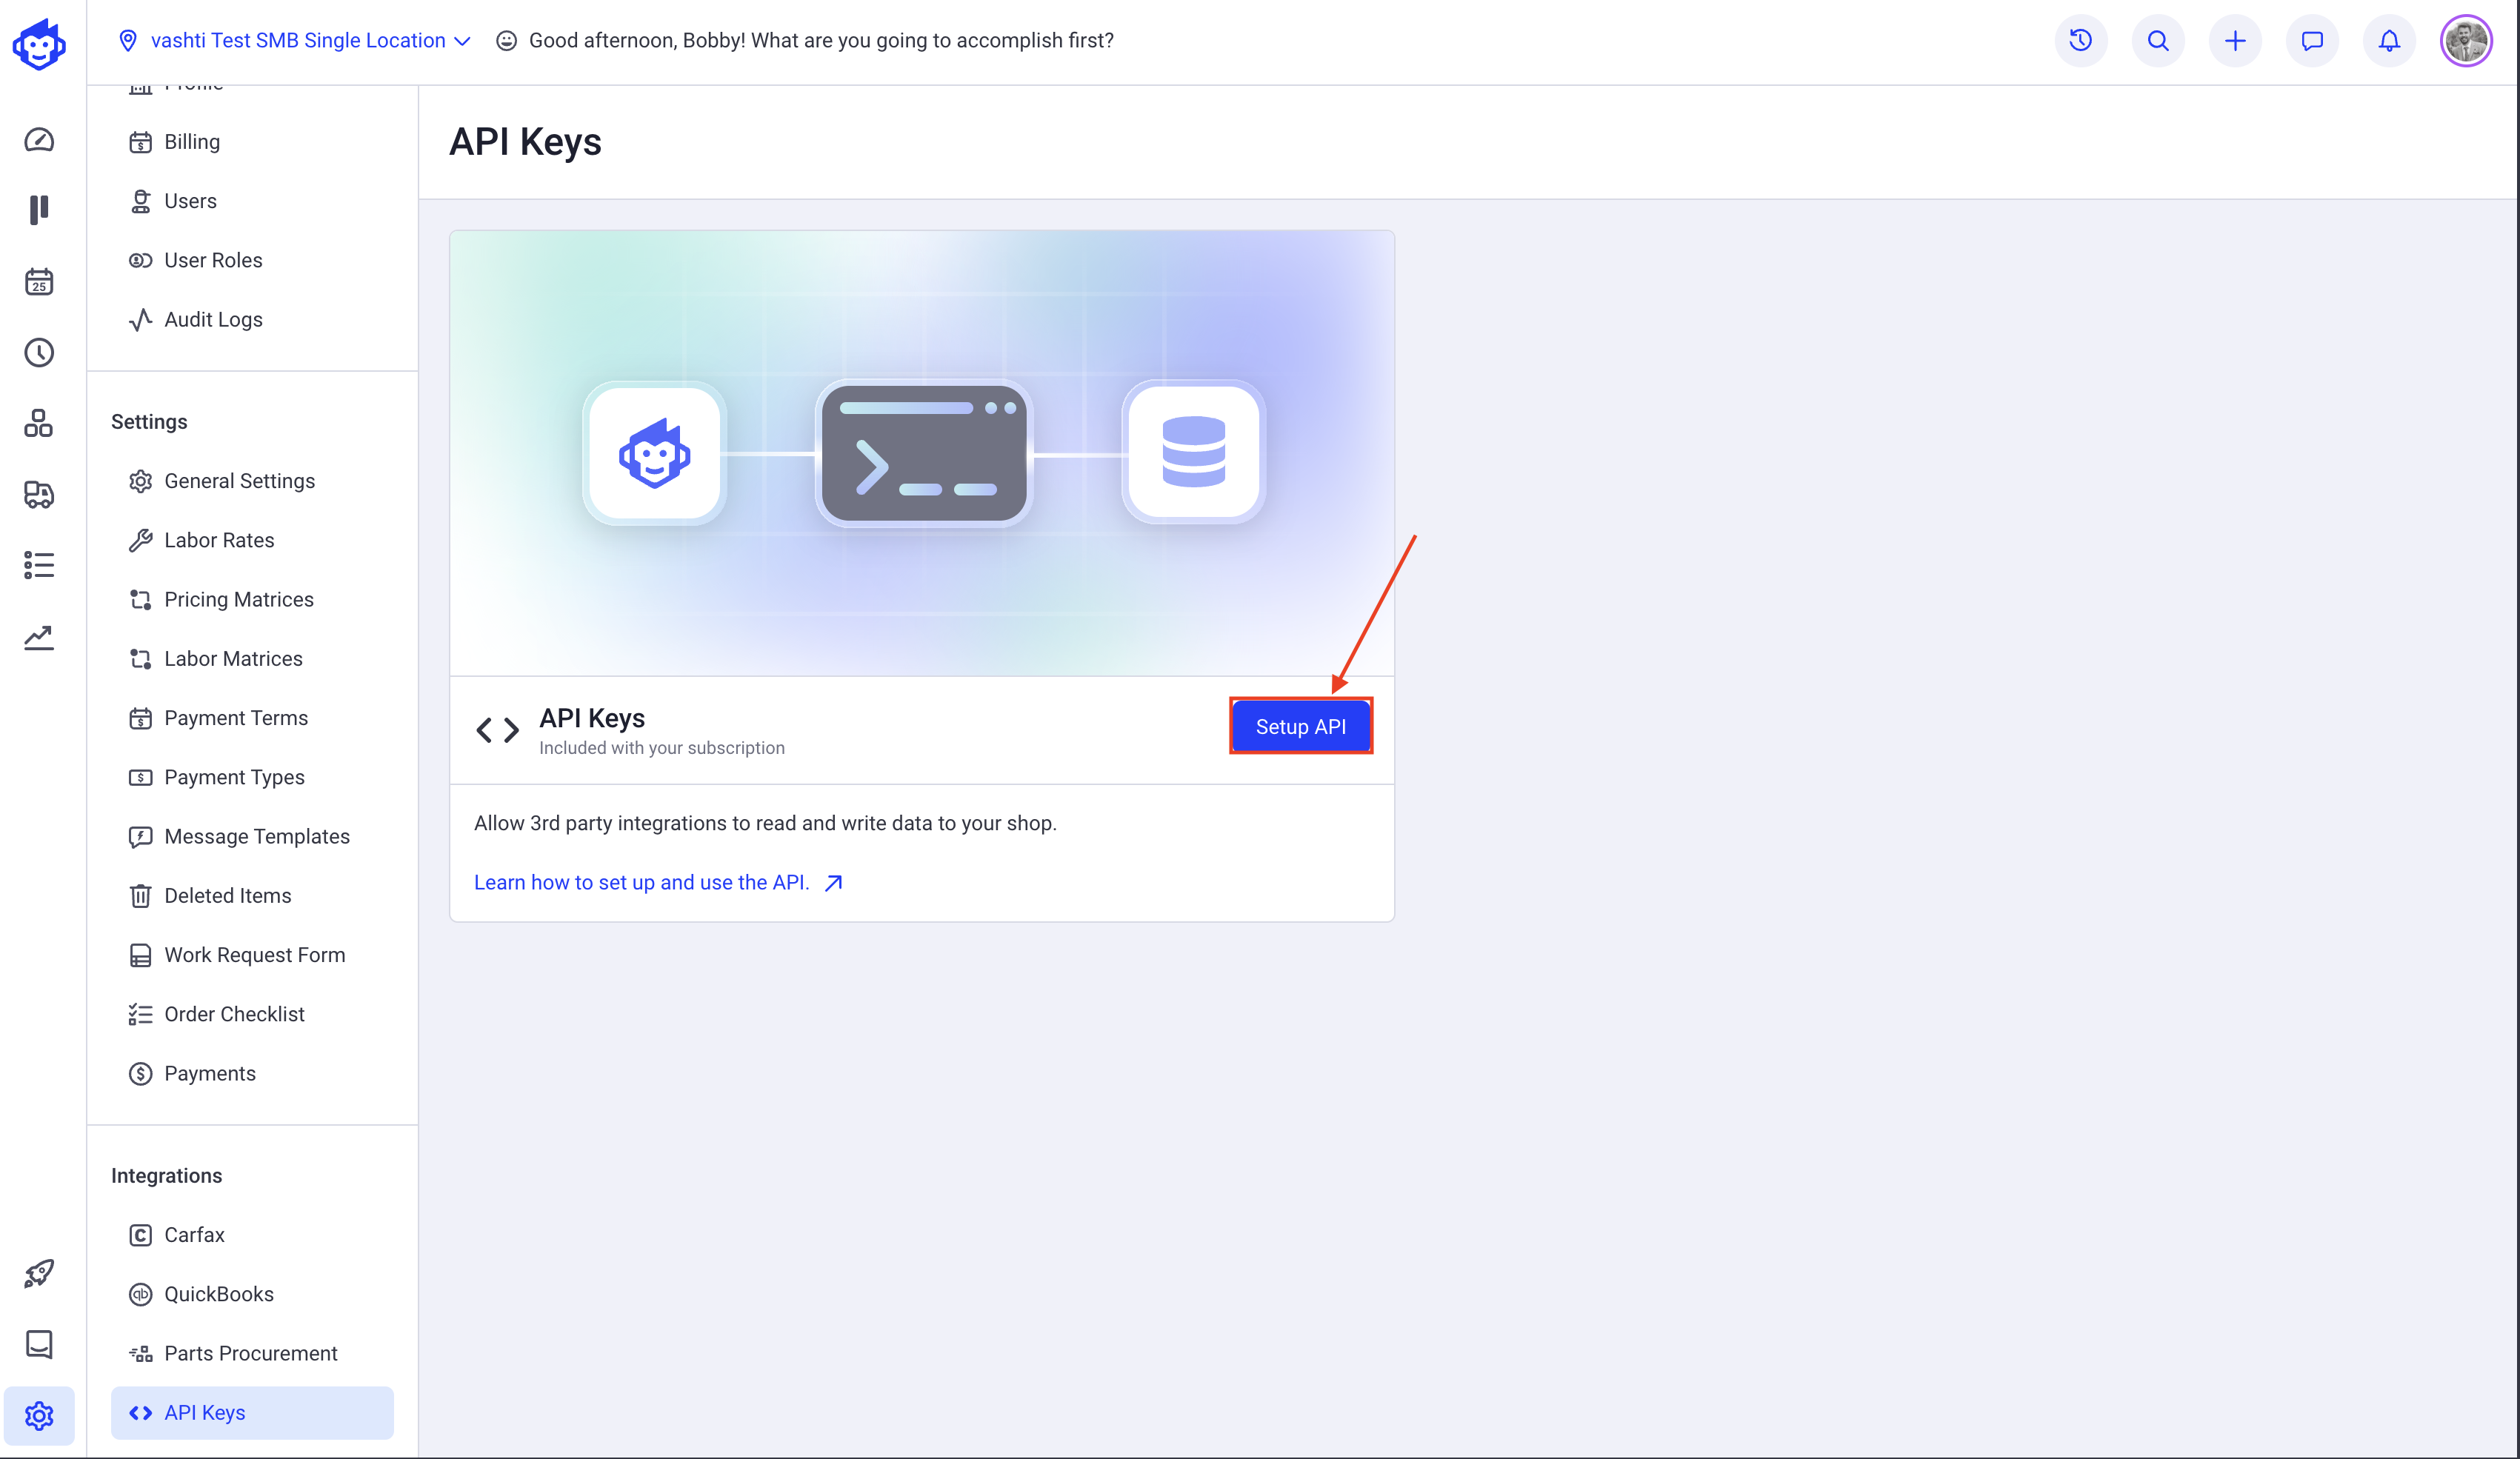
-
Click Create API Key
Proceed to create a new API key and fill out the required fields.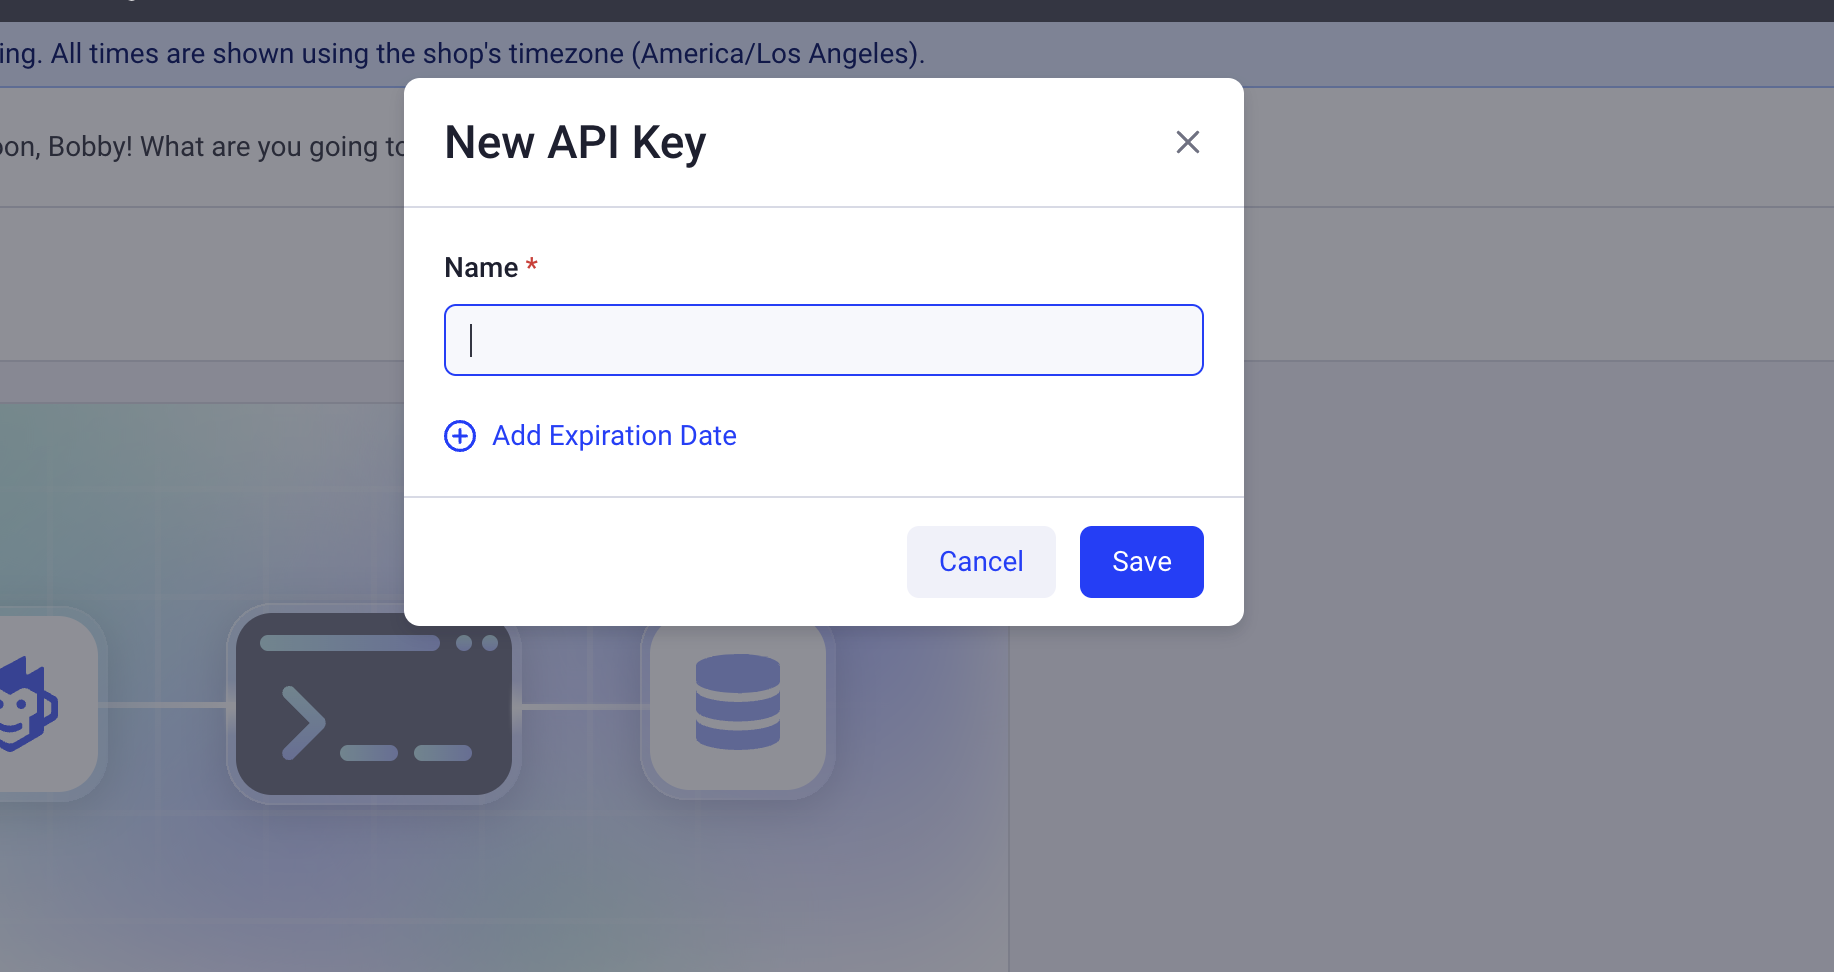
-
Copy the API Key
After generating the key, copy it immediately.For security reasons, the API key cannot be viewed again. Save it in a secure location.
Check API Key status
To check that you have a valid API Key and are authorizing requests correctly, use the API Key status route with your token.
Example request with bearer token
curl https://api.shopmonkey.cloud/v3/auth/api_key/status \
  -H "Authorization: Bearer ${SM_TOKEN}"
Replace SM_TOKEN with your token or set it in your environment.
Always keep your token safe and reset it if you suspect it has been compromised.
Creating and using a long lived API key
For certain operations, you might need a long lived API Key. You can generate a new API Key, optionally with an expiration date, in the Shopmonkey web app.
Invalidating your API Key
You can invalidate your API key and make it no longer usable using the Shopmonkey web app.
Once you invalidate your API Key, it will no longer be usable.
Rate Limiting
The Shopmonkey API is rate limited. This means that you can only make a certain number of requests at a certain rate over a period of time. We use rate limiting to help protect the API and to make sure accidental issues don't overwhelm our system.
Please reach out to support for more information about our rate limits.
If you are rate limited, you will receive a 429 HTTP status code with information in the headers about when you can retry your request.
Retry-After: The number of seconds to wait before you can submit additional API requestsX-RateLimit-Remaining-Minute: the remaining number of requests within a rolling 60 second window before you are limitedX-RateLimit-Limit-Minute: the number of requests an API key can make in a rolling 60 second window.
In addition, when you are rate limited, you we also see the header retry-after which is the number of seconds you should wait before retrying your request.
Errors
In this guide, we will talk about what happens when something goes wrong while you work with the Shopmonkey API. Mistakes happen, and mostly they will be yours, not ours. Let's look at some status codes and error types you might encounter.
You can tell if your request was successful by checking the status code when receiving an API response. If a response comes back unsuccessful, you can use the error type and error message to figure out what has gone wrong and do some rudimentary debugging (before contacting support).
Status codes
Here is a list of the different categories of status codes returned by the Shopmonkey API. Use these to understand if a request was successful.
Error types
Whenever a request is unsuccessful, the Shopmonkey API will return an error response with an error type and message. You can use this information to understand better what has gone wrong and how to fix it. Most of the error messages are pretty helpful and actionable.
Example Error response
{
  "success": false,
  "code": "API-0efe28",
  "message": "No way this is happening!?",
  "documentation_url": "https://shopmonkey.dev/error/API-0efe28"
}
Debugging
Each request to the Shopmonkey API returns a unique request identifier in the HTTP headers to assist in debugging:
x-request-id: the unique id for the request
In the event you are experiencing an unexpected API error, please share the x-request-id value from the HTTP headers with our Support Team to assist in debugging.